So, I read this blog called Woolen Diversions. Alicia designed a fabulous cowl and asked for testers. I loved the look of this Estonian shell business, so I contacted her for the pattern.
![IMG_2531[1] Alicia's Cowl](http://www.metzroth.com/katie/wp-content/uploads/2012/10/IMG_25311-300x225.jpg)
I knit a lot of socks, so the amount of “super chunky” yarn I have in my stash is….almost zero. I had no choice whatsoever but to do a drive by at the Local Yarn Store. I’m not going to lie. I ALMOST bought some orange sock yarn just because I never find orange sock yarn I like in person and the dyer was there at the time and….I was NOT there for sock yarn. Super chunky yarn and size 8 double-pointed needles for a baby hat and that’s it. I know, you’re shocked.
I looked at yarn that seemed super chunky to me and ended up with some lovely Malabrigo. I did give in and buy a matching button that was 50% off. I’m not made of steel. When I got home I realized the yarn was actually called Chunky, so it could not be “super chunky”. One would think I’d have noticed that before I purchased it. I did not. It looked super chunky to this sock knitter and it was blue.
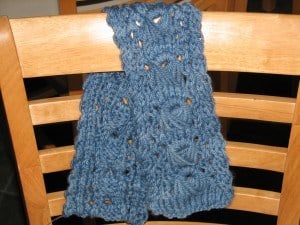
Luckily, it seems to be working out just fine.
Ps. To see what other folks are working on, check out Tami’s Amis.
Tags: Alicia Landi,
Chunky yarn,
cowl,
Estonian shell,
knit,
Malabrigo,
Malabrigo Chunky,
Woolen Diversions
Comments Off on Steps to your own no-bake Twilight Cake
Category:
food
Breaking Dawn 2 is coming out in about a month, so I’m starting to think about Twilight party preparations. I realized I’d never posted how to upgrade a regular storebought cake to Twilight party quality, so here you go!
1. Buy what I think is a 1/4 sheet cake at your local grocery store. I got an Italian Cream Cake, but I’m hoping next time that there’s a red velvet option. It was in the fridge section and had hard cream cheese icing with chocolate decorative swirls on top.
2. Buy black decorating gel.
3. Use toothpicks to carefully peel the icing design off the top of the cake. You can still see where the chocolate icing design bled onto the top of the cake behind “Twilight”, but the icing itself is gone.
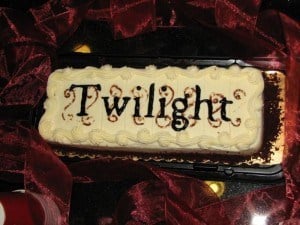
4. I printed the word Twilight out (using Google images search) and carefully cut the letters out – leaving the template/stencil. You’ll need an exacto knife, a cutting board, and some patience.
5. Place the template on the cake and paint it in with the black gel icing until “Twilight” has emerged.
6. Carefully remove paper stencil and stick the the cake in your fridge until you’re ready to serve it to your fellow Twilighters.
Tags: cake,
MIY Monday,
Twilight
…the sheep’s in the meadow and the dog’s in the kitchen….’cause every time the camera comes out, she thinks “treats!”.

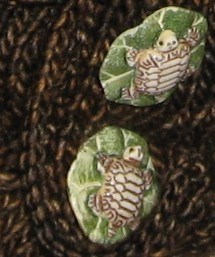
I bought these buttons specifically for Turtle in NYC when she was newly pregnant. So, I put them to use on this cute baby kimono. Behold, my first sweater!
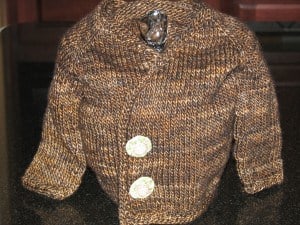
Pattern: Seamless Kimono by Carina Spencer
Yarn: Madelinetosh Tosh DK Fig
Fastenings: Buttons are sewn on and have snaps behind them because button loops now give me nightmares and you need to knit the garter border if you want button holes. I figured that out a scoach too late. Scottiegirly suggested the snaps and The Husband consulted on button placement. I may have asked him where to put the turtles 50 times. may have.
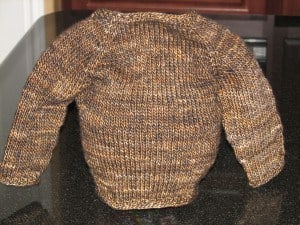
Overall, I loved this pattern; it’s great for a first sweater…and I’m feeling pretty good about my decision not to try matching the green on the buttons.
Ps. Check out what other folks have finished at Tami’s Amis and Fiber Arts Fridays
Tags: Carina Spencer,
Fig,
FO Friday,
Madelinetosh,
Seamless Kimono,
Tosh DK,
turtle
![IMG_2531[1] Alicia's Cowl](http://www.metzroth.com/katie/wp-content/uploads/2012/10/IMG_25311-300x225.jpg)

![Thanks to therapy and figuring out the ending of my book, we made a big change this year. I’m sharing the news with my Inner Circle later this month.
Spoiler alert: it’s happy news!
If you’ve enjoyed my Inner Circle Email short romances, please leave a comment for the algie gremlins.
I hope you’re having the week you need, Crew! I love you!!!
[ID: ramen and a purply pink Constellate hat in progress] #funnyparanormalromance](https://www.metzroth.com/katie/wp-content/plugins/instagram-feed/img/placeholder.png)
